Process plan and Optimized parameters and Redesign
Step
|
Operation
|
Machine
|
Tool
|
Justification
|
Cavity Mold
|
||||
1
|
Bore cavity mold Rough Pass
|
PUMA Lathe
|
T1010
0.03125 Large Bore
|
Use bore tool to make a rough pass
and cut out the design for the base of the yoyo cavity
|
2
|
Bore cavity mold finish pass
|
PUMA Lathe
|
T1010
0.03125 Large Bore
|
Use bore tool again on final pass to
smooth mold
|
1m 16.94s
|
||||
3
|
Make runner from sprue to part
|
Protrak Mill
|
#9 sphere endmill
|
Use the sphere endmill to create the
runner from the sprue to the part
|
4
|
Widened base to add mass
|
PUMA Lathe
|
T1010
|
Our part is too light, so by widening the cavity mold we are adding
mass to the outer rim of the yoyo base and also adding mass to the ring
|
Core Mold
|
||||
1
|
Lathe rough pass core mold
|
PUMA Lathe
|
T0101
Turning Face tool
|
Turn down the face of the mold to
match the core of the base part of the yoyo
|
2
|
Lathe finish pass core mold
|
PUMA Lathe
|
T0101 Turning Face tool
|
Finish pass over previous cut to
smooth and clean
|
3
|
Lathe Groove rough pass
|
PUMA Lathe
|
T0909 Trepan Tool
|
Turn the center of the part down to
match the central axis and mounting point for the earth part onto the base
mold.
|
4
|
Lathe groove finish pass
|
PUMA Lathe
|
T0808
Trepan tool
|
Smooth out previous step using a slightly
smaller radius trepan
|
5
|
Mill Peck Drill
|
Protrak Mill
|
3/16” flat endmill
|
Drill out the center shaft of the
core mold
|
6
|
Circle Mill for center shaft
|
Protrak Mill
|
Circle mill
|
Fully mills out center shaft
|
7
|
Center drill for ejector pin holes
|
Protrak Mill
|
#13 drill: #2 center drill
|
Preps ejector pin holes to be drilled
|
8
|
Drill ejector pin holes
|
Protrak Mill
|
#17 Drill
|
Drills out holes for the ejector pins
|
9
|
Face off .01 on the core
|
PUMA lathe
|
T1010
|
By facing off a bit of the core, we are making the base of the base
part thicker and adding more mass
|
10
|
Deepen the groove
|
PUMA lathe
|
T0909
|
By deepening the groove in the core mold we are increasing the amount
of engagement the base has with the ring, hopefully this will solve the ring
snap fit issue (it falls off too easily)
|
11
|
Finish the groove
|
PUMA lathe
|
T0808
|
Recreates a nice right angle in the groove
|
In
general for the base mold, we increased the depth of the groove, faced off a
bit of the core, and widened the cavity base mold. The first will allow for
more engagement of the ring and the base to help make a secure snap fit. The
later two are adding more mass to the yoyo, which should help its spin.
As for
the process parameters for the injection molding machine:
Injection hold
Injection hold pressure profile
|
||||
450
|
500
|
550
|
600
|
700
|
600
|
500
|
400
|
350
|
300
|
Injection hold time
|
10 s
|
|||
Cooling time
|
20 s
|
|||
Set screw feed stroke
|
2 in
|
|||
Injection Boost
Injection speed profile
|
||||
3.5
|
3.5
|
4
|
4
|
4.5
|
4.5
|
4
|
3.5
|
2.5
|
2.5
|
Injection boost pressure: 1399 psi
|
||||
Screw Feeding
Screw Feed delay time: 5 s
Ejector counter = 2
Ejector pin length = 5.647
Total shim thickness = 0
In addition to finding these process parameters (which were optimized to give the air a chance to escape), we had to create an air vent for trapped air to escape.
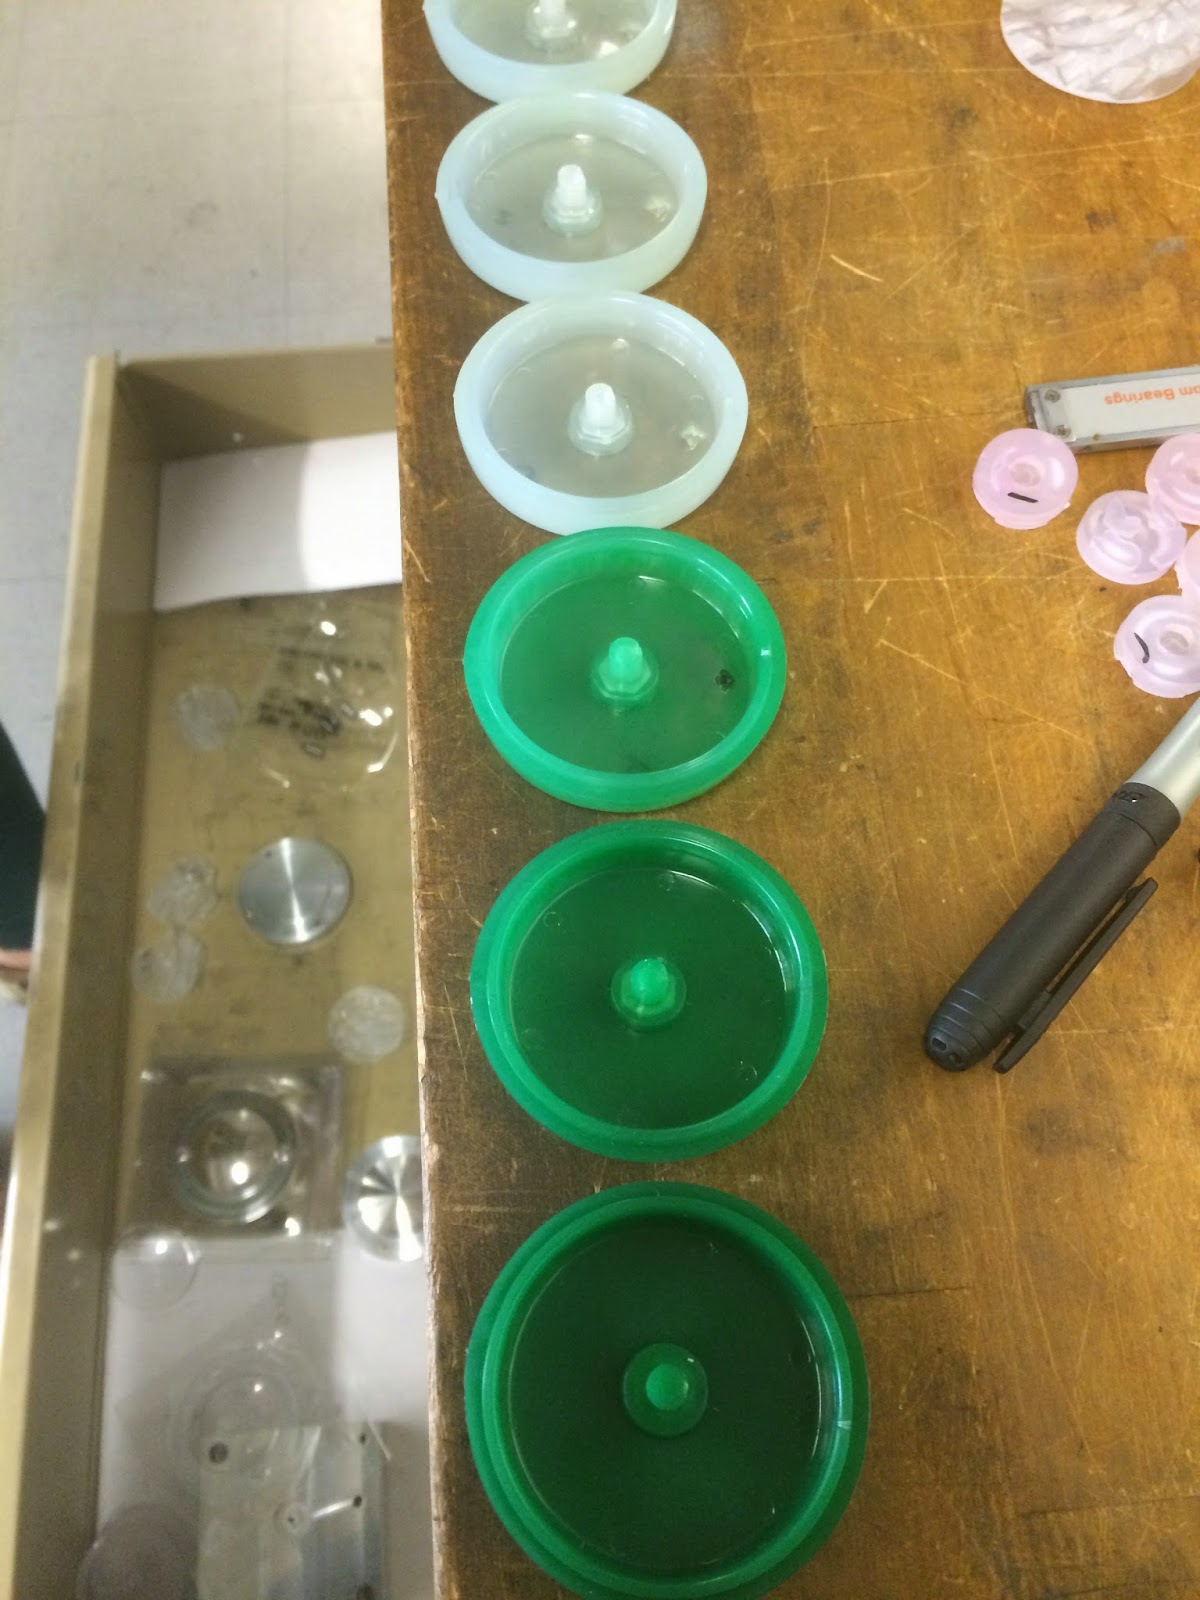
The part kept
looking like this without the air vent.
 |
| All parts aside from the bottom two have bubbles or air burn! |
As you can see, there appears to be a
bubble/burn on the right side of these parts. No matter how we altered the
parameters, the air trap wouldn’t go away and thus the air vent was necessary.
Our optimized part looks like this:
The problem of air
trap was solved!
However, the base
mold and the ring mold weren’t fitting together well after they were optimized.
We could get a snap fit, but the amount of engagement between the ring and the
base was too small and the ring would easily fall off in a drop test. To solve
this issue, we doubled the length of engagement and also widened the base and
the ring to add mass and add strength to the ring (so it would not be as elastic).
The process plan for these alterations has been added to the process plan
above. I completed the alterations in lab yesterday and will reoptimize the
injection molding parameters on Thursday. Hopefully then, our ring and base
will fit will together and not fail during a drop test.

No comments:
Post a Comment